
If you find yourself with some last minute gift wrapping to do, (confession... haven't even started mine yet) and want something other then the standard ribbon to tie your gifts up in, here's a simple way to make your own lovely twine...

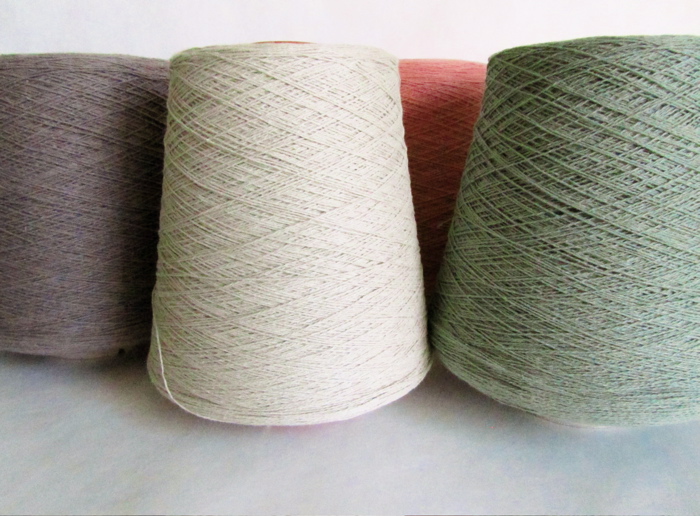
First you will need to cut several individual lengths of yarn. Any yarn will do, just keep in mind that the thicker the yarn, the thicker the twine will be. I like to use a thin perle cotton yarn.
For this example I am making a thin multicolored twine and am using just three strands of yarn, one in pink, one in green and one in off-white. (Note that the more individual lengths you use, the thicker the twine will be. Want rope? Just use thick yarn and more individual pieces!)


And there you go, your very own twine!

Happy Holidays to all of you!

Cut the individual pieces of yarn about three times the length you would like your finished twine to be. I tend to cut my individual pieces of yarn about 6 yards long, which gives me a finished piece of twine just over a yard long. If you want a longer strand that's fine, but you may need some one to assist you towards the end so things don't get too knotted up... I will explain more later.

Next you will need some device to help you as you tightly twist the individual strands of yarn together. Pictured above are three things that I have used to make twine. The first item is that odd looking wood thing... it's used to wind boat shuttle bobbins for loom weaving, and does the job of twisting super quick. The next item is an old vintage hand drill that belonged to my grandfather. It also works great in twisting the strands of yarn together. And last but not least is the humble pencil, which is what I used for many years and works just dandy... just a bit slower then the other devices.
Whichever item you have on hand, simply tie one end of the yarn strands to the chosen tool. Take the other end of the yarn strands and tie them in a knot. Then tie them to a stationary object like a door handle or a drawer pull. You can also tie them to a clothes pin and drop the clothes pin into a drawer. Shut the drawer and the clothes pin and yarn ends stay inside.
Now, go back to your winding device. Holding your device, stand far enough away from the other end that the strings are not on the floor, but also leave some slack. Now, start winding. (If you are using a pencil the yarn ends will be tied around the middle of it. Just keep flipping the pencil around and around to twist the yarn together.)

Keep winding until the string is tight and taut and there is no slack. (The tighter the twist the better the end result will be.) It will look something like the photo above, (excuse the poor quality of these photos... it's been very cloudy and rainy here and the light has been dismal.)

We are almost done! Keeping the string taut, tightly pinch the ends attached to the winding device and cut them off, careful not to let the string unwind. Then start walking that end towards the other end that is attached to a knob or a drawer. You want to be careful to keep the strings from touching until the two ends can meet. (Note: As I walk to meet the other end, I run my free hand along the length of twisted string helping to keep the tension tight. When I get to the middle of the string I then bring the two ends together. If my yarn length is to long for me to comfortably do this, I have someone else stand at the middle, keeping the tension tight, as I move to join the two ends together.

As soon as the two lengths of twisted string meet they will immediately begin to twist upon themselves, as shown in the photo above. Knot both ends together and carefully run your hand down the length of the twisted twine, smoothing the twists down and evenly distributing them throughout...

And there you go, your very own twine!

Happy Holidays to all of you!


